How to Set Up a Print File
Setting up a print file is a crucial step in ensuring your design translates seamlessly from the digital realm to the world of print. Whether you're crafting a business card, brochure, or poster, the success of your printed material hinges on good file preparation. From choosing the right color mode and resolution to incorporating bleed and trim marks, every detail plays a role in the quality of the final product.
Let's explore the steps required to transform your digital creation into a print-ready file, providing guidance for both experienced designers and newcomers to the world of print
What is a print file?
In the world of printing, a print file is a digital file that contains the design or artwork necessary for creating a physical copy of a document or image. When someone refers to a print file as "print ready," it means that the file meets all the specifications required to produce a high-resolution print product without any further modifications.
A print file typically encompasses various elements such as layout, text, graphics, colors, and more, which collectively form the final printed piece. These files can exist in different formats, including PDF, JPEG, TIFF, EPS, depending on the specific printing process and equipment involved.
However, it's good to note that different printing processes and devices may require specific file formats or configurations to achieve the desired results. It's crucial to ensure that the print file is compatible with the intended printing method for successful results.
What you need to set up a print file
Creating a print file may seem like a complex process, but we're here to simplify it for you. When you prepare a digital file for printing, you need to ensure that it includes all the necessary elements and specifications. Here are the essential steps and elements you should consider when setting up a print file.
File types
When it comes to sending your file to the print shop, the most convenient and popular option is to send it as a PDF. However, some print shops may accept other file formats like Illustrator (.ai) and Photoshop (.psd). To avoid any confusion, it's always recommended to double-check with your printer about their preferred file type for printing.
.png?width=462&height=225&name=Screen%20Shot%202024-01-03%20at%203.16.25%20PM%20(2).png)
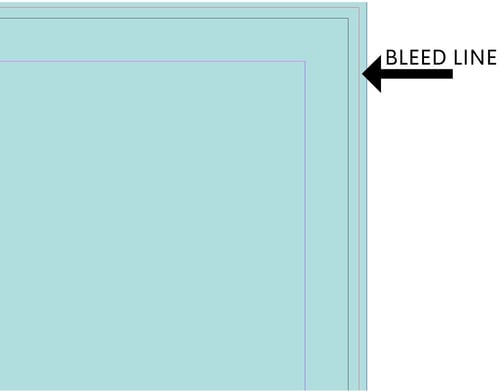
Bleed requirements
If your design includes any elements that extend to the edge of the page, it's important to include bleed in your print file. Most printing companies require a minimum of 1/8-inch bleed for these objects. To set up your PDF file with bleed, simply make it ¼-inch larger than the final trim size. For example, if your document is 8 ½-inch x 11-inch, the PDF size should be 8 ¾-inch x 11 ¼-inch. However, if your design doesn't require bleed, you can make your PDF the same size as the final trim size.
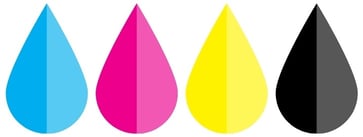
Color
Selecting the appropriate color mode plays a vital role in setting up a print file to achieve the best results. For vibrant, full color printing, it is highly recommended to utilize the CMYK color mode, which encompasses Cyan, Magenta, Yellow, and Black. This color model is specifically tailored for print production, facilitating the accurate reproduction of a wide spectrum of colors. Alternatively, you can opt for "spot" colors, which are solid colors created using a specific pre-mixed ink, often following the Pantone Color naming convention.
*Make sure you remove colors that aren’t being used in your document
Fonts
To avoid any font-related problems, it is important to embed or outline all the fonts used in your document. This ensures that the printer has access to the required fonts and prevents any issues during the printing process. Additionally, we recommend using a font size no smaller than 7 points to ensure legibility and clarity in your printed material.
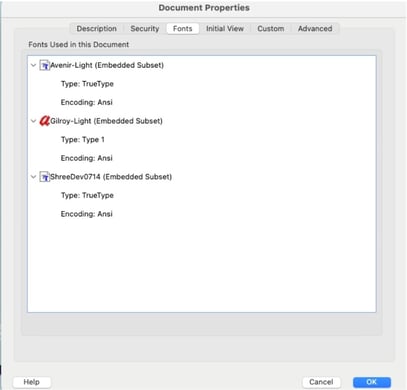
Image quality
Ensuring that your images are of the highest resolution is essential for a professional print job. When using images from the internet, they typically have a resolution of 72 DPI, which is not suitable for printing. For optimal results, make sure all images in your print file have a resolution of at least 300 DPI. Additionally, if you have any line art in your design, it is recommended to have a resolution of at least 1200 DPI.
- Color – all images being used in your document should be converted to CMYK.
- Ink density – keep the maximum ink density at 300.
- Compression – do not apply compression to files (e.g. JPEG or LZW)
*Compression is used to minimize size in bytes without degrading image quality.
Variable data
Variable data printing is a form of digital printing where elements such as text, graphics and images may be changed from one printed piece to the next. This information comes from a database or external file. If you want to include variable data on your print files, make sure to set up the objects in your file exactly the way you want them to appear. (i.e. position, color, font, etc.)

Always consult with your printing service provider for specific guidelines and recommendations based on their equipment and processes. Providing a well-prepared print file helps ensure a smooth printing process and high-quality results.
The takeaway
Bottom line, if you have any doubts or concerns regarding the setup of your print file, don't hesitate to reach out to your trusted printing service provider. They have the expertise and knowledge to guide you through the process, ensuring that you have a clear understanding of what you're doing and that the final product aligns with your intentions. By consulting with your printer, you can eliminate any potential confusion or mistakes that may arise during the printing process.
If you're interested in learning more about print files, reach out to us at Aradius Group! We have a team of experts ready to assist in making your printed pieces come to life.